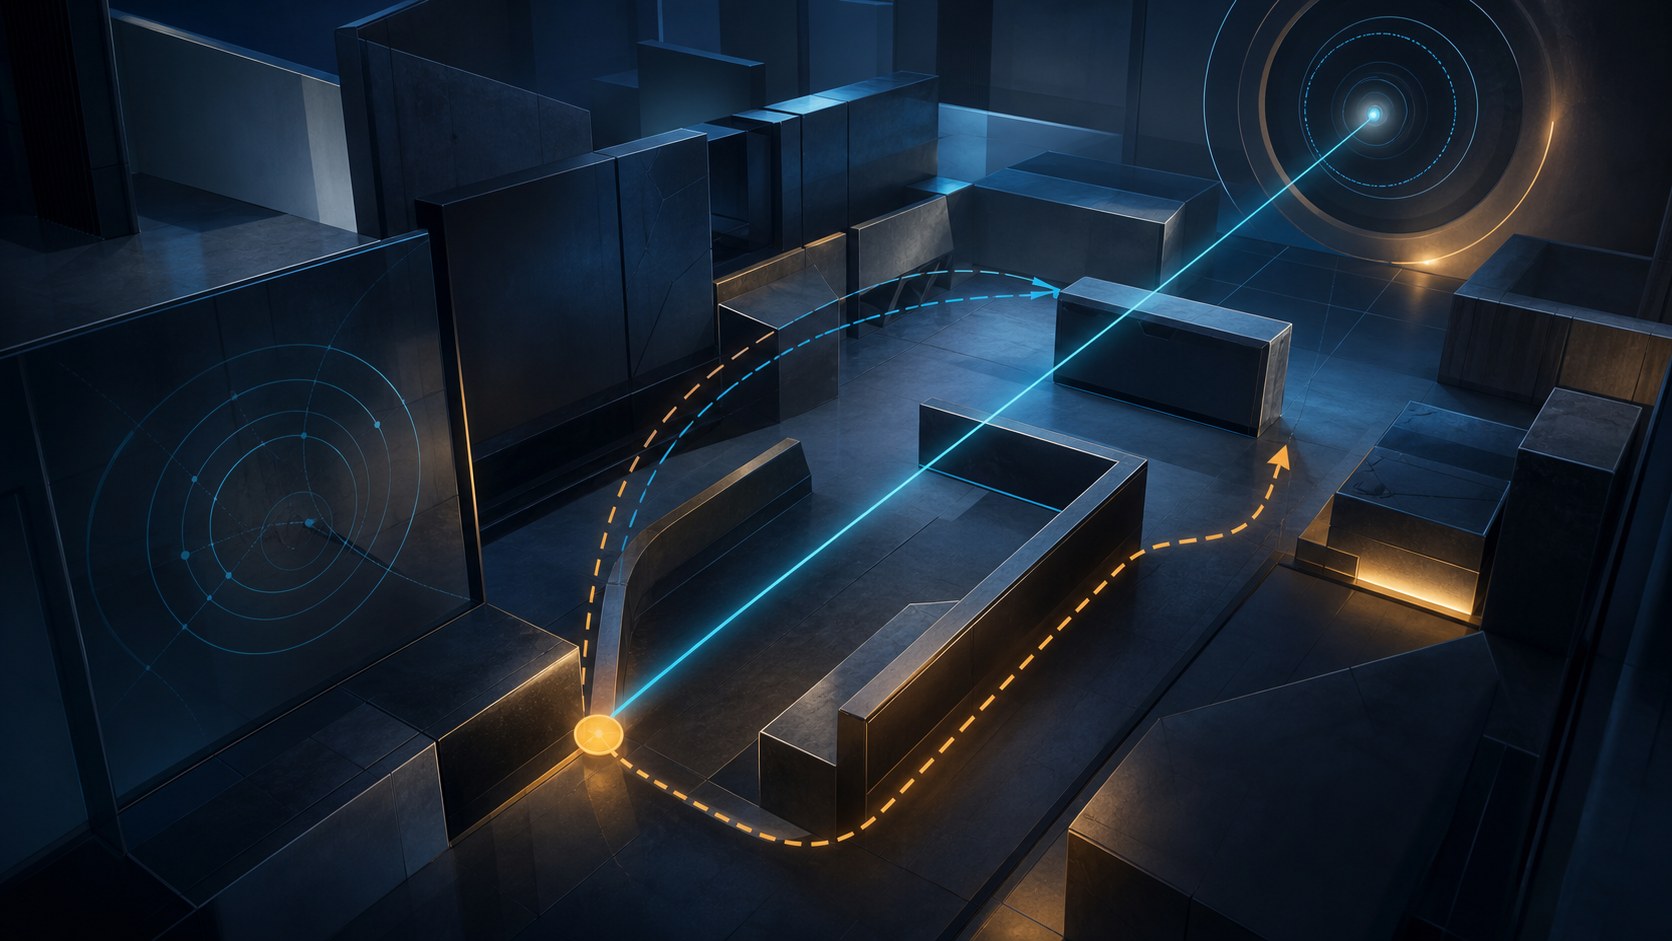
The AWP can end a duel with one accurate shot, but buying it does not make someone a sniper. Strong AWP players win before they click: they choose a favorable sightline, arrive with a safe escape, place the crosshair where the next target is likely to appear, and expose themselves for as little time as possible.
This CS2 AWP guide explains the complete process. You will learn how to peek, hold angles, pre-aim, reposition after a shot, work with utility, manage the weapon’s economy, and practice accuracy without building bad habits. The goal is not a collection of flashy highlights. It is a repeatable system for landing high-value shots and staying alive.
The short answer: AWP accuracy comes from four actions in the correct order: arrive behind cover, pre-aim the expected path, stop completely before firing, and leave the angle immediately after the shot. If any link is missing, even excellent mouse aim becomes unreliable.
AWP Fundamentals: Why One Shot Changes the Round
The AWP is a high-risk investment. Liquipedia’s current weapon data lists a $4,750 purchase price, a $100 kill reward, five rounds in the active magazine, bolt-action operation, and much slower movement while scoped. Its power is obvious, but its hidden cost is equally important: a missed shot creates a long window in which a rifle can close distance or trade you.
| AWP strength | What it rewards | What punishes it |
|---|---|---|
| One-shot body kill in most cases | Center-mass placement and first-shot discipline | Leg shots, missed timing, multiple close attackers |
| Long-range scope | Early information and narrow sightlines | Flashes, smokes, wide swings and isolation |
| Fear and map control | Changing positions and denying predictable paths | Repeating the same angle without support |
| High purchase value | Survival, recovery and team coordination | Unnecessary repeeks and unwinnable retakes |
Do not evaluate an AWPer only by kills. A player who gets one opening pick, survives, forces the enemy to spend two flashes and a smoke, then rotates with the weapon may create more round value than someone who finds two exit kills after the site is lost.
The Accuracy Rule: Stop Before You Shoot
The AWP is not reliably accurate while moving. The visual sequence can feel instant, but the mechanical sequence must be deliberate:
- Move into the intended line.
- Release the movement key or counter-stop.
- Let the weapon reach an accurate state.
- Confirm the target has entered the crosshair.
- Fire once, then return to safety.
New AWP players often scope, see an opponent and shoot while their model still carries sideways velocity. The miss looks like bad aim, yet the crosshair may have been placed correctly. Practice separating crosshair error from movement error. If your crosshair was on the torso but the shot missed while sliding, work on stopping. If you were stationary but consistently behind the target, work on placement and reaction timing.
Quick-scopes and no-scopes are emergency tools, not the foundation of consistent AWP play. Liquipedia notes that full scoped accuracy requires a stationary moment and that unscoped shots are inconsistent. Build your game around high-percentage scoped shots; treat the dramatic alternatives as last-resort options.
Peek Techniques: How an AWPer Takes an Angle

A peek is not simply pressing A or D. It is a controlled information action with a defined width, expected target and exit. Before moving, decide whether you want to reveal almost nothing, challenge one position, or cross several possible angles.
1. The tight shoulder peek
A shoulder peek briefly exposes the edge of your model to draw a shot or confirm that an opponent is holding. It is strongest when you already suspect an enemy AWP or rifle is waiting. Do not intend to fire. Your objective is information or baiting the shot, followed by a real peek during the opponent’s recovery.
Keep the movement shallow and return behind hard cover. Overextending transforms a safe bait into a free death. Against high ping or an angle with wall penetration, even a shoulder peek carries risk, so use utility or a teammate when the round cannot afford the gamble.
2. The narrow scoped peek
Pre-scope behind cover, place the crosshair at the first likely target line, then move only far enough to expose that position. Stop and fire if the target is present. This is the default AWP peek when checking one known angle.
The advantage is isolation: you fight one location instead of opening yourself to the entire site. The weakness is movement speed and tunnel vision. If the first line is empty, return to cover and reset before checking the next one.
3. The wide swing
A wider peek can beat an opponent whose crosshair is glued to the corner. It changes the timing and forces a larger correction. However, the AWPer also spends longer in the open and needs more time to stop accurately. Wide-swing only when you have a reason: a teammate flash, strong information, a close-angle opponent, or an escape route that remains available.
4. The crouch peek
Crouching changes your head and body level and can help stabilize a committed shot, but it also makes retreat slow. Use it when the duel is isolated and you are prepared to commit. Avoid turning every peek into a crouch; predictable elevation makes you easier to pre-aim, while the loss of mobility is dangerous against a second opponent.
5. The jump spot for information
When the angle is too dangerous to dry peek, a jump spot can reveal movement without risking the AWP itself. The purpose is not to shoot in the air. Gather information, land behind cover, communicate what you saw, then choose a supported re-peek, rotation or utility response.
| Peek | Primary purpose | Best condition | Main risk |
|---|---|---|---|
| Shoulder | Bait a shot or confirm a hold | Enemy position suspected | Overexposing the model |
| Narrow scoped | Clear one line precisely | Known or likely target lane | Tunnel vision |
| Wide swing | Break tight crosshair placement | Flash, timing or strong information | Long exposure and slow stop |
| Crouch | Commit to a stable duel | Isolated opponent | Poor escape speed |
| Jump spot | Collect information safely | Dangerous long sightline | Repeating a readable pattern |
Holding Angles: Build a Shot Before the Enemy Arrives
Holding is the AWP’s natural advantage. You can place the crosshair first and make the opponent enter it. Yet a good hold requires more than aiming at a doorway.
Choose the correct crosshair distance
Do not always put the scope directly against the corner. Your reaction time, the enemy’s likely speed and the width of the expected swing determine the gap.
- Tight hold: best when the enemy may walk, jiggle, shoulder or expose only a small amount.
- Medium hold: the reliable default for a normal running peek.
- Wide hold: useful when a fast swing, jump or boosted player is likely.
If you repeatedly fire behind opponents, your placement is probably too tight for your reaction time. Move the crosshair farther from the wall before changing sensitivity. If you fire ahead of them, reduce the gap.
Hold from cover, not beside it
Your position needs a clean retreat. Stand close enough to hard cover that one movement returns you to safety, but avoid pressing into geometry that traps your model or limits the scope. The best AWP angle offers:
- one primary line to watch;
- minimal exposure to secondary positions;
- a path to disengage after firing;
- a teammate or utility answer if opponents rush;
- a new position for the next shot.
Off-angles versus standard angles
A standard angle is easy to understand and often easy to support, but opponents are likely to prefire or flash it. An off-angle places you somewhere outside normal clearing rhythm. It can create a free first shot, yet it may have a weaker escape and less teammate support.
Use off-angles as temporary surprises, not permanent homes. After revealing one, assume the opponent will clear it correctly next time.
Pre-Aim: Put the Scope Where the Duel Will Happen
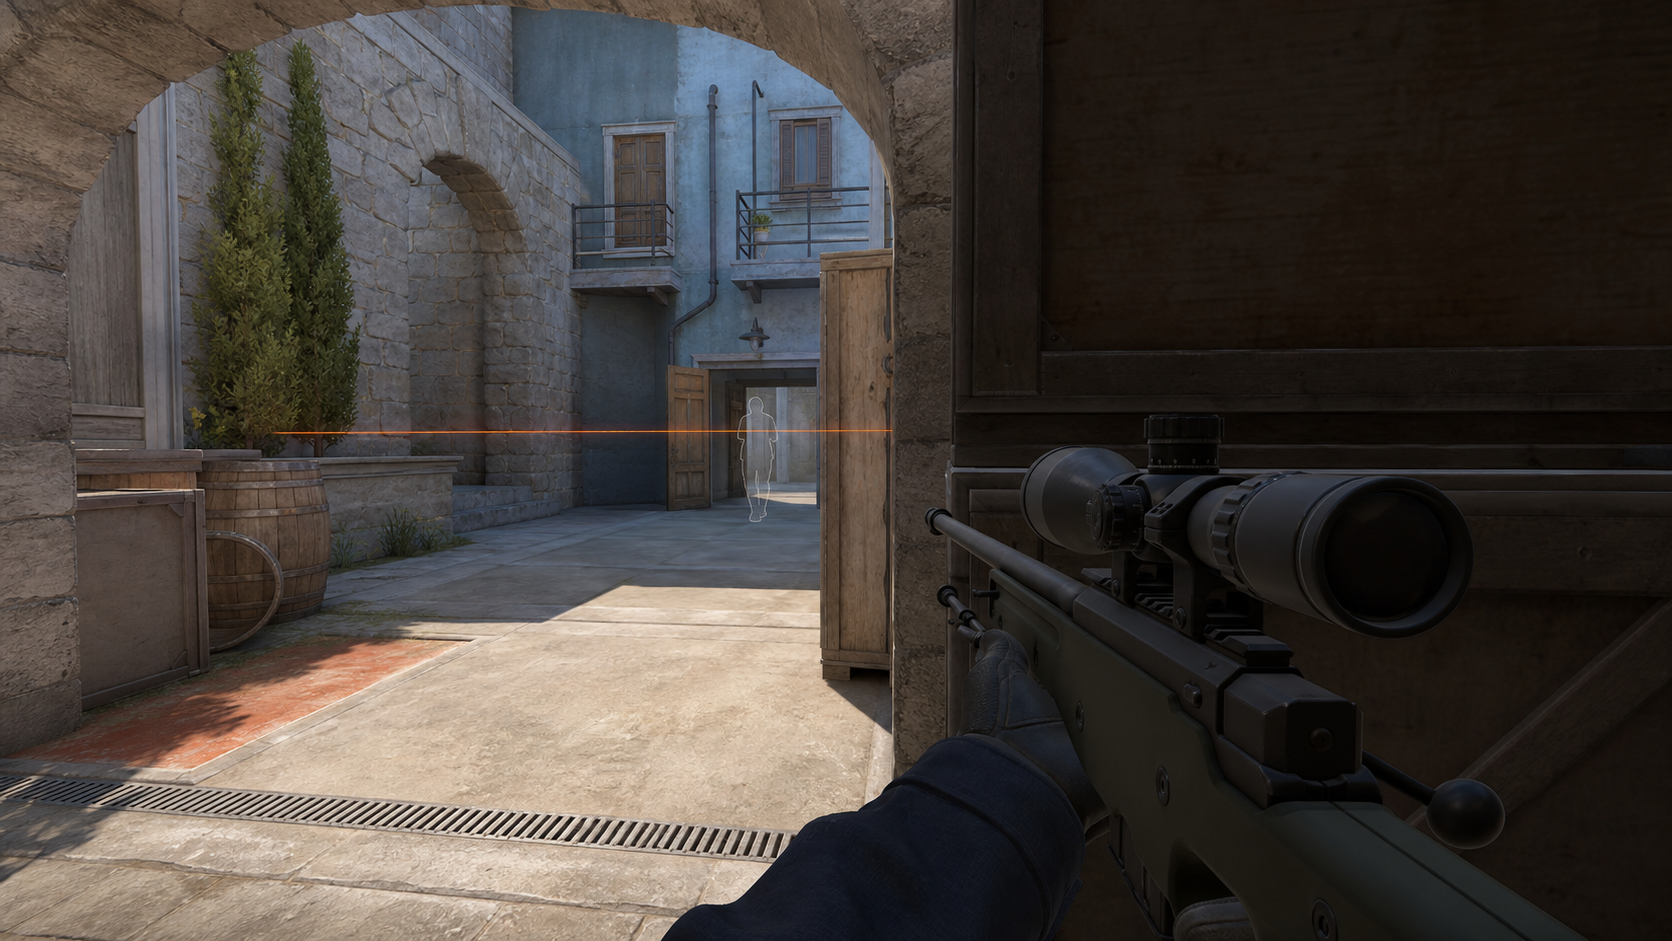
Pre-aim is the most important accuracy shortcut in Counter-Strike. Instead of reacting across a large screen area, you reduce the task to a small timing correction.
Pre-aim center mass
Rifles chase head level because a headshot ends the duel fastest. The AWP usually does not need that precision. Aim around the upper torso where a normal model is most likely to intersect the line. Avoid placing the scope too low: a leg hit may fail to kill and gives the opponent a chance to trade.
Trace the wall before exposing
When approaching an angle unscoped, use the visible environment to align with the expected target position through the wall. Scope before exposure when appropriate, then make only a small horizontal correction. This reduces the need for a large flick after you are already visible.
Pre-aim the next angle, not the last kill
After a shot, many players remain visually attached to the eliminated opponent. Reset immediately. Ask where the trade will come from, move behind cover, and place the scope for that second line only if the position remains defensible.
Use map geometry as a memory system
Memorize stable visual references: the edge of a crate, a change in wall texture, a doorway seam or a shadow boundary. These references let you rebuild a pre-aim without searching. Do not memorize pixel-perfect screenshots alone; learn the relationship between your cover, the target path and the retreat route.
One Shot, One Decision: Repositioning After Contact
Once the AWP fires, the entire enemy team knows the weapon and approximate position. Your next decision matters as much as the shot.
- Hit and leave: take the opening advantage and force opponents to clear a new line.
- Miss and leave: avoid the emotional repeek while the opponent is ready.
- Hold only with a reason: a teammate is covering the trade, the enemy is trapped, or utility denies the rush.
- Communicate: report damage, enemy count, utility and your new position.
Changing elevation, distance or side of the lane forces the next opponent to solve a new problem. A small reposition can be enough. You do not always need to rotate across the map; you need to stop giving the same sight picture twice.
Utility for AWP Players
The AWP is often enabled by utility rather than replaced by it. A flash can create the half-second required to cross into a powerful line. A smoke can isolate one duel or let the AWPer escape. Fire can deny the close corner from which a rifle would overwhelm the scope.
| Utility | AWP use | Common mistake |
|---|---|---|
| Flashbang | Enable an opening peek, reclaim a line, or escape pressure | Flashing after the AWPer has already exposed |
| Smoke | Cut secondary angles, cross safely, or recover the weapon | Blocking the only sightline without a new plan |
| Molotov / incendiary | Clear close cover or delay a fast collapse | Holding it until the AWPer is already rushed |
| HE grenade | Finish a tagged opponent or punish a known group | Switching away from the AWP during live contact |
Ask teammates for flashes with precise timing: name the position, say when you will peek, and confirm whether the flash lands in front of or behind your line. “Flash me” is not a complete call.
CT-Side AWP: Control, Delay, and Survive
On CT side, the AWP can deny a long entrance and provide early information, but defenders have fewer resources. Losing the weapon may damage two rounds of economy. The CT AWPer should therefore think in layers:
- Opening layer: take one supported first contact from a favorable spawn or angle.
- Delay layer: fall back to a second line while teammates rotate.
- Site layer: hold a plant lane or force attackers through a narrow path.
- Save layer: preserve the weapon when the retake probability no longer justifies the risk.
An AWP trapped on a site is less valuable than an AWP that fires, retreats and makes attackers spend time and utility. If you are learning team economy, read the CS2 economy guide before forcing the weapon into every round.
T-Side AWP: Find the Opening and Protect the Trade
T-side AWPing is not passive sightseeing from spawn. Your job is to challenge defender information, punish rotations, cover teammates crossing dangerous lanes and prevent aggressive CTs from taking free space.
In a default, hold a likely push while riflers gather map control. During an execute, either find the opening before utility lands or hold the rotation and trade lane while teammates enter. After the bomb is planted, move to a position that watches the defuse path without becoming isolated from the bomb.
Do not carry every essential execute grenade if your first job is an AWP duel. A support rifler should preserve the utility that the site hit needs. Our CS2 builds and tactics guide explains how to divide weapons, grenades and responsibilities across the team.
AWP Economy: When the Purchase Is Actually Correct
The price is not only $4,750. Armor, a useful pistol and utility can push a complete setup much higher. Buying the AWP while four teammates hold weak pistols often produces one expensive player and no round plan.
Before purchasing, ask:
- Can the team field enough rifles and armor to support the weapon?
- Do we have utility to reach or defend the intended angle?
- Is someone prepared to recover the AWP if I fall?
- Does the map position actually favor long-range contact?
- Will this buy destroy the next round if it fails?
Sometimes an SSG 08, rifle or saved weapon is the stronger team decision. The best AWPer is not the player who buys it most often; it is the player who converts the investment into round control.
Scope Discipline and Peripheral Information
The first zoom level is the practical default for most engagements because it preserves more awareness and requires less transition time. Deeper zoom has value for exceptionally long or narrow lines, but it magnifies tunnel vision.
Unscope when the angle is no longer live. Check the radar, listen for utility, read the kill feed and confirm teammate positions. A sniper who watches an empty corridor for 30 seconds while the round collapses elsewhere is not holding; they are disconnected.
Your underlying mouse setup must also permit small corrections without panic. If the scope feels uncontrollable, use our CS2 sensitivity guide to test eDPI and movement range instead of copying a professional value blindly.
A Practical 30-Minute AWP Training Routine
| Time | Drill | Success condition |
|---|---|---|
| 5 minutes | Stationary center-mass shots on fixed targets | Clean single shots without hurried corrections |
| 5 minutes | Strafe, stop, scope and fire | No shot leaves while movement remains |
| 5 minutes | Narrow peek from both directions | Expose only one target line |
| 5 minutes | Hold targets appearing at varied widths | Adjust crosshair gap instead of flicking wildly |
| 5 minutes | One shot followed by immediate cover | Every attempt ends behind safety |
| 5 minutes | Map pre-aim route | Crosshair reaches each common line before exposure |
Train misses as seriously as hits. After each miss, identify one cause: moving, overflicking, poor pre-aim, wrong hold width, panic or target misread. Random repetition without diagnosis only makes the mistake more familiar.
A simple accuracy journal
For three matches, record opening attempts rather than total kills:
- Was the shot supported by information or utility?
- Were you stationary?
- Was the crosshair already near the target?
- Did you survive or become tradable after firing?
- Did you repeat the same revealed position?
This gives you a better improvement signal than raw accuracy percentage. A technically accurate exit kill may have little impact; a missed opening shot followed by a safe retreat may still preserve the round.
Ten Common AWP Mistakes
- Shooting before stopping. The crosshair is correct, but movement ruins the shot.
- Holding too tightly. Normal swings pass the scope before reaction.
- Repeeking emotionally. A miss becomes a second, more predictable duel.
- No escape route. The angle provides a shot but no survival plan.
- Overusing deep zoom. Peripheral information disappears.
- Aiming at legs. A hit may not secure the elimination.
- Standing alone. A rushed AWPer has no close-range support.
- Buying without team economy. The weapon weakens four teammates.
- Saving too late. The exit is cut off and the investment is lost.
- Training only flicks. Spectacular mechanics replace repeatable pre-aim and movement.
CS2 AWP FAQ
Should a beginner aim for the head with the AWP?
Usually no. Place the scope around upper center mass. The AWP’s value is converting a larger body target with one shot; demanding a headshot adds unnecessary precision and increases misses.
Should I scope before or after peeking?
Pre-scope when checking one known long-range line from cover. Peek unscoped when you need movement speed, broad information or a fast cross, then scope only after reaching the intended position. The choice depends on how many angles can see you.
Why do I miss when the crosshair looks on target?
The most common causes are residual movement, firing before the scope is settled, aiming at a moving edge rather than center mass, or misreading the shot because the visual moment is fast. Record a practice session and check movement first.
How often should an AWPer reposition?
Reposition whenever the opponent has confirmed your line and can prefire, flash, smoke or swarm it. After a shot, assume your location is known. You may hold again when teammates and utility make that decision favorable, but it should be deliberate.
Is high sensitivity better for AWP flicks?
Not automatically. A sensitivity must allow controlled micro-corrections, comfortable turns and repeatable stopping. Pre-aim reduces the need for huge flicks. Choose a stable setup through testing rather than chasing highlight speed.
When should I save the AWP?
Save when the realistic retake or clutch probability is lower than the future value of the weapon, especially when exits remain open and the next team buy would otherwise be weak. Consider score, teammate money, enemy positions, kits, utility and time—not the weapon price alone.
Final Checklist: The Reliable AWP Shot
- Choose an angle with cover and a retreat.
- Predict whether the opponent will walk, jiggle or swing.
- Place the scope at upper center mass with the correct gap.
- Stop completely before firing.
- Take one high-percentage shot.
- Return to safety and communicate.
- Reposition unless there is a clear reason to hold again.
The AWP feels like a weapon of reactions, but consistent sniping is mostly preparation. Better peeks reduce exposure. Better angle holds reduce mouse movement. Better pre-aim turns difficult flicks into small corrections. Better repositioning keeps one missed shot from becoming a lost $4,750 investment. Build those decisions first, and accuracy will follow.
For the wider learning path, begin with the CS2 beginner guide, compare every purchase in the complete weapons guide, and browse the Counter-Strike 2 column.
Sources and Update Notes
- Liquipedia Counter-Strike Wiki — AWP weapon data and tactical notes
- Valve — Counter-Strike 2 official overview
- Valve — November 2025 update covering sniper un-scope consistency and hit-registration playback
- Valve — August 2025 update covering AWP deploy-animation improvements
Mechanics, prices, ammunition and map behavior can change through live updates. This guide was checked against the cited sources on July 28, 2026. Principles such as stopping before firing, isolating angles, pre-aiming likely paths and planning an escape remain useful even when individual values change.